How do I assign items in my list to a store?
-
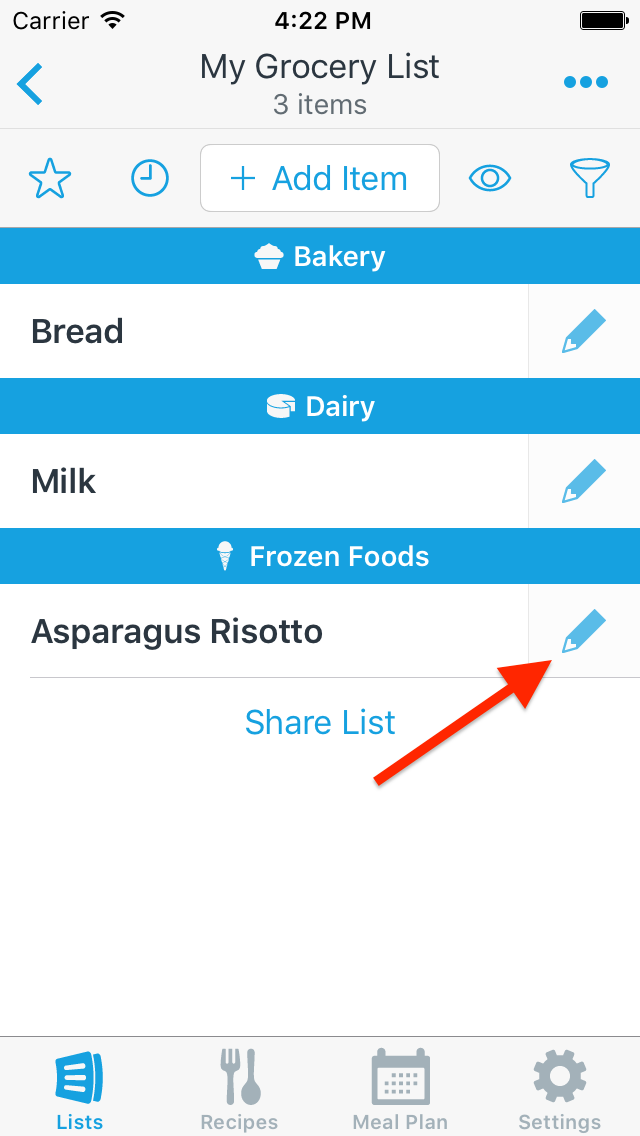
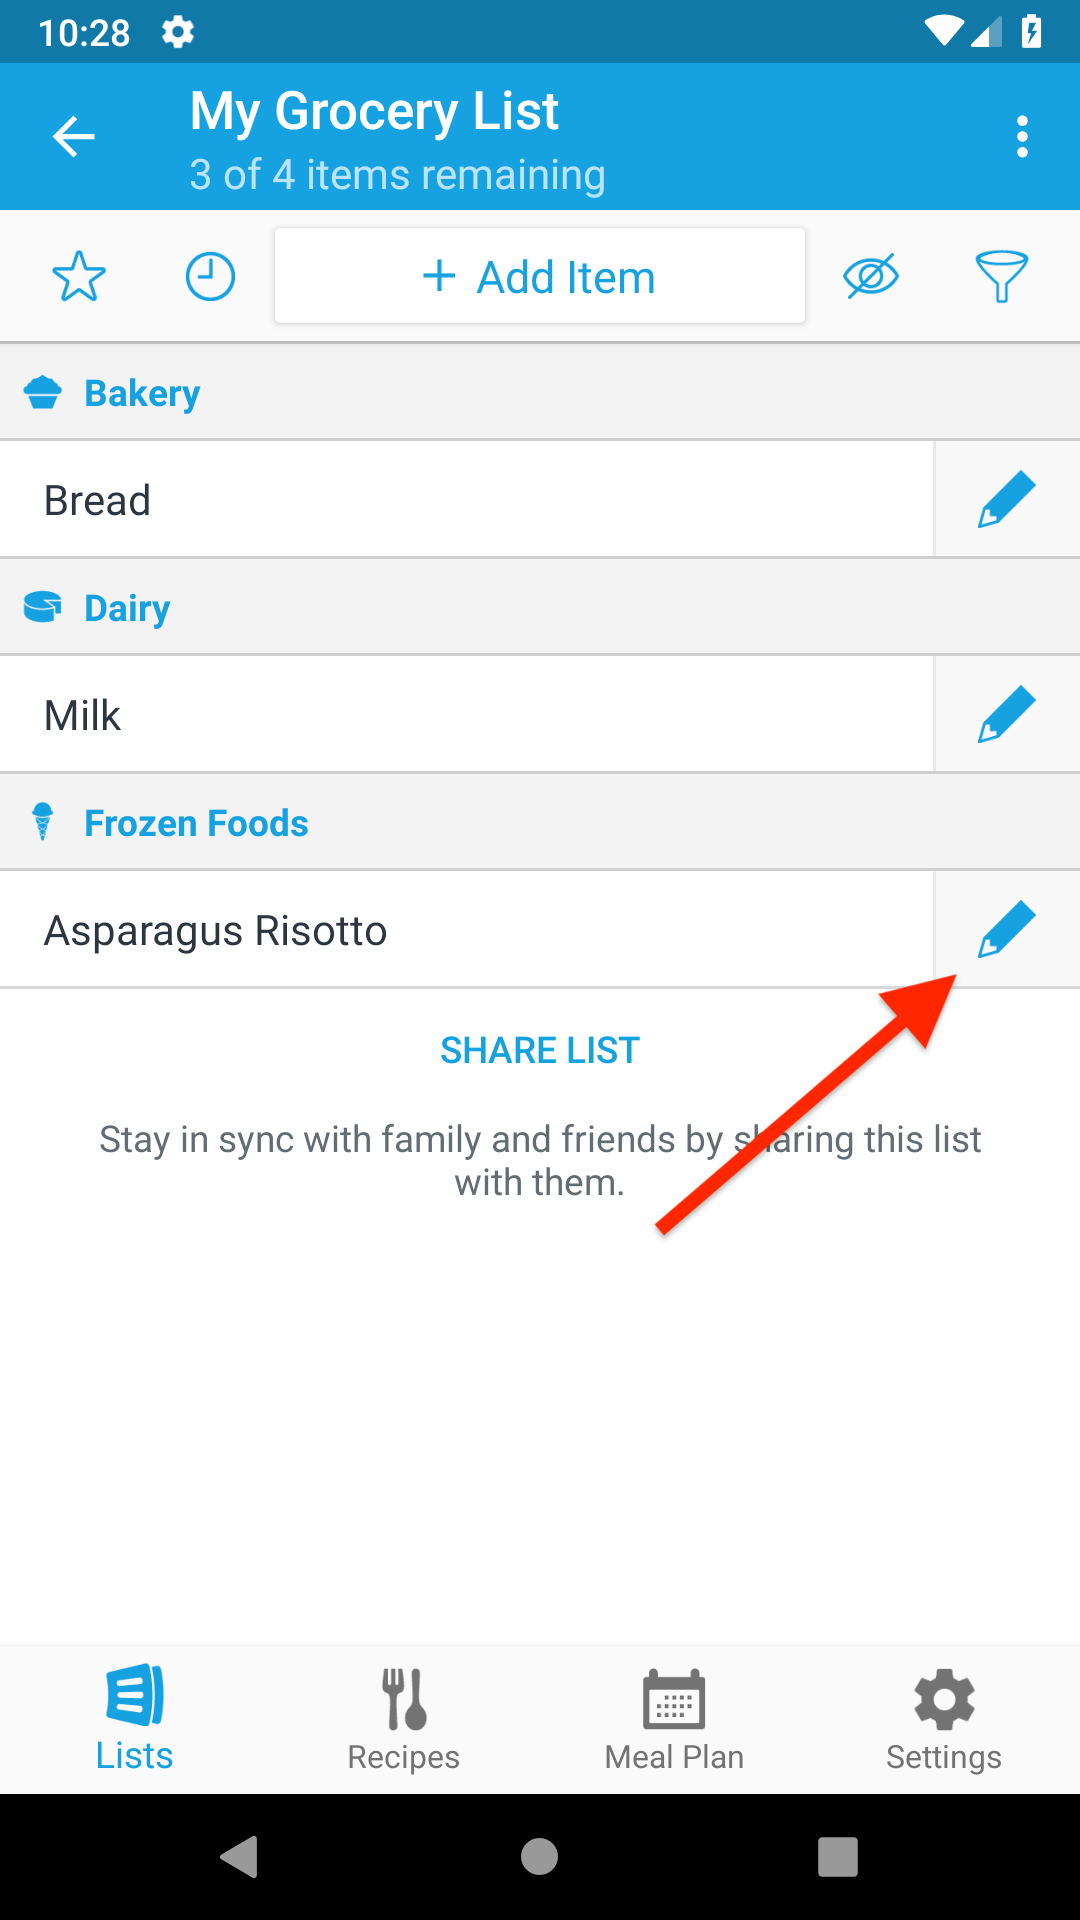
Find the item you’d like to assign to a store and tap the pencil icon to its right.
![]()
-
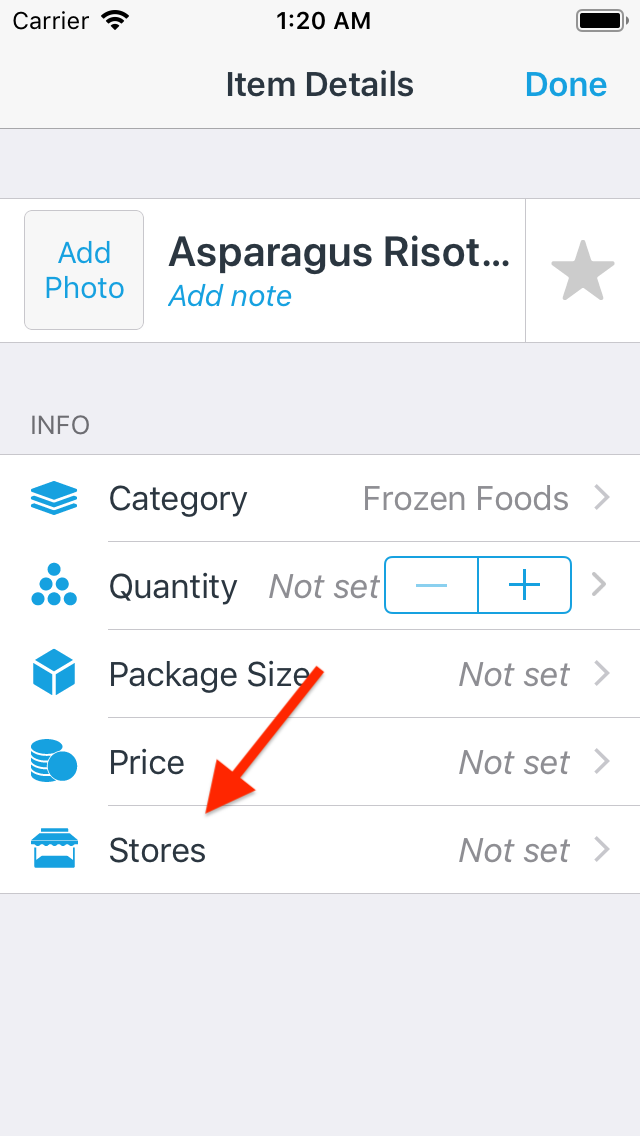
Select the Stores row.
![]()
-
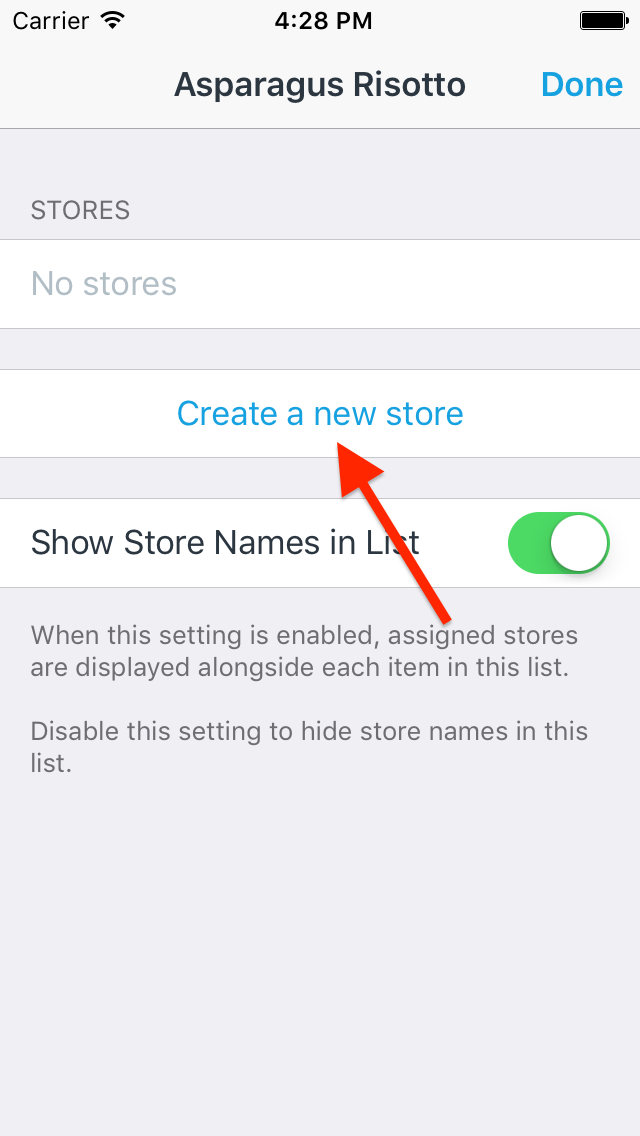
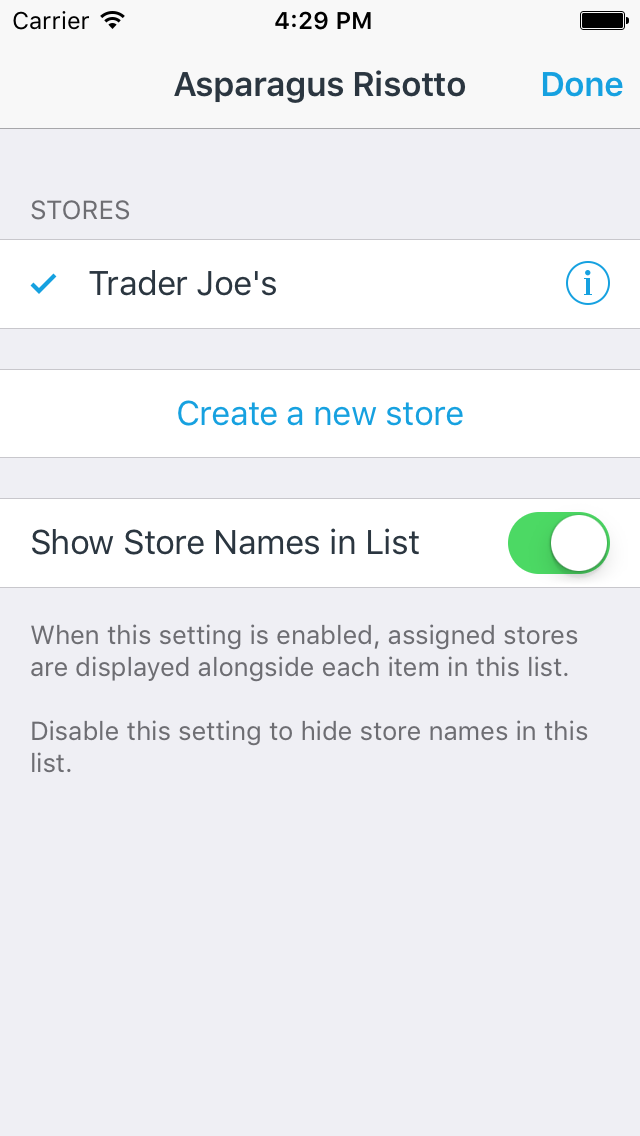
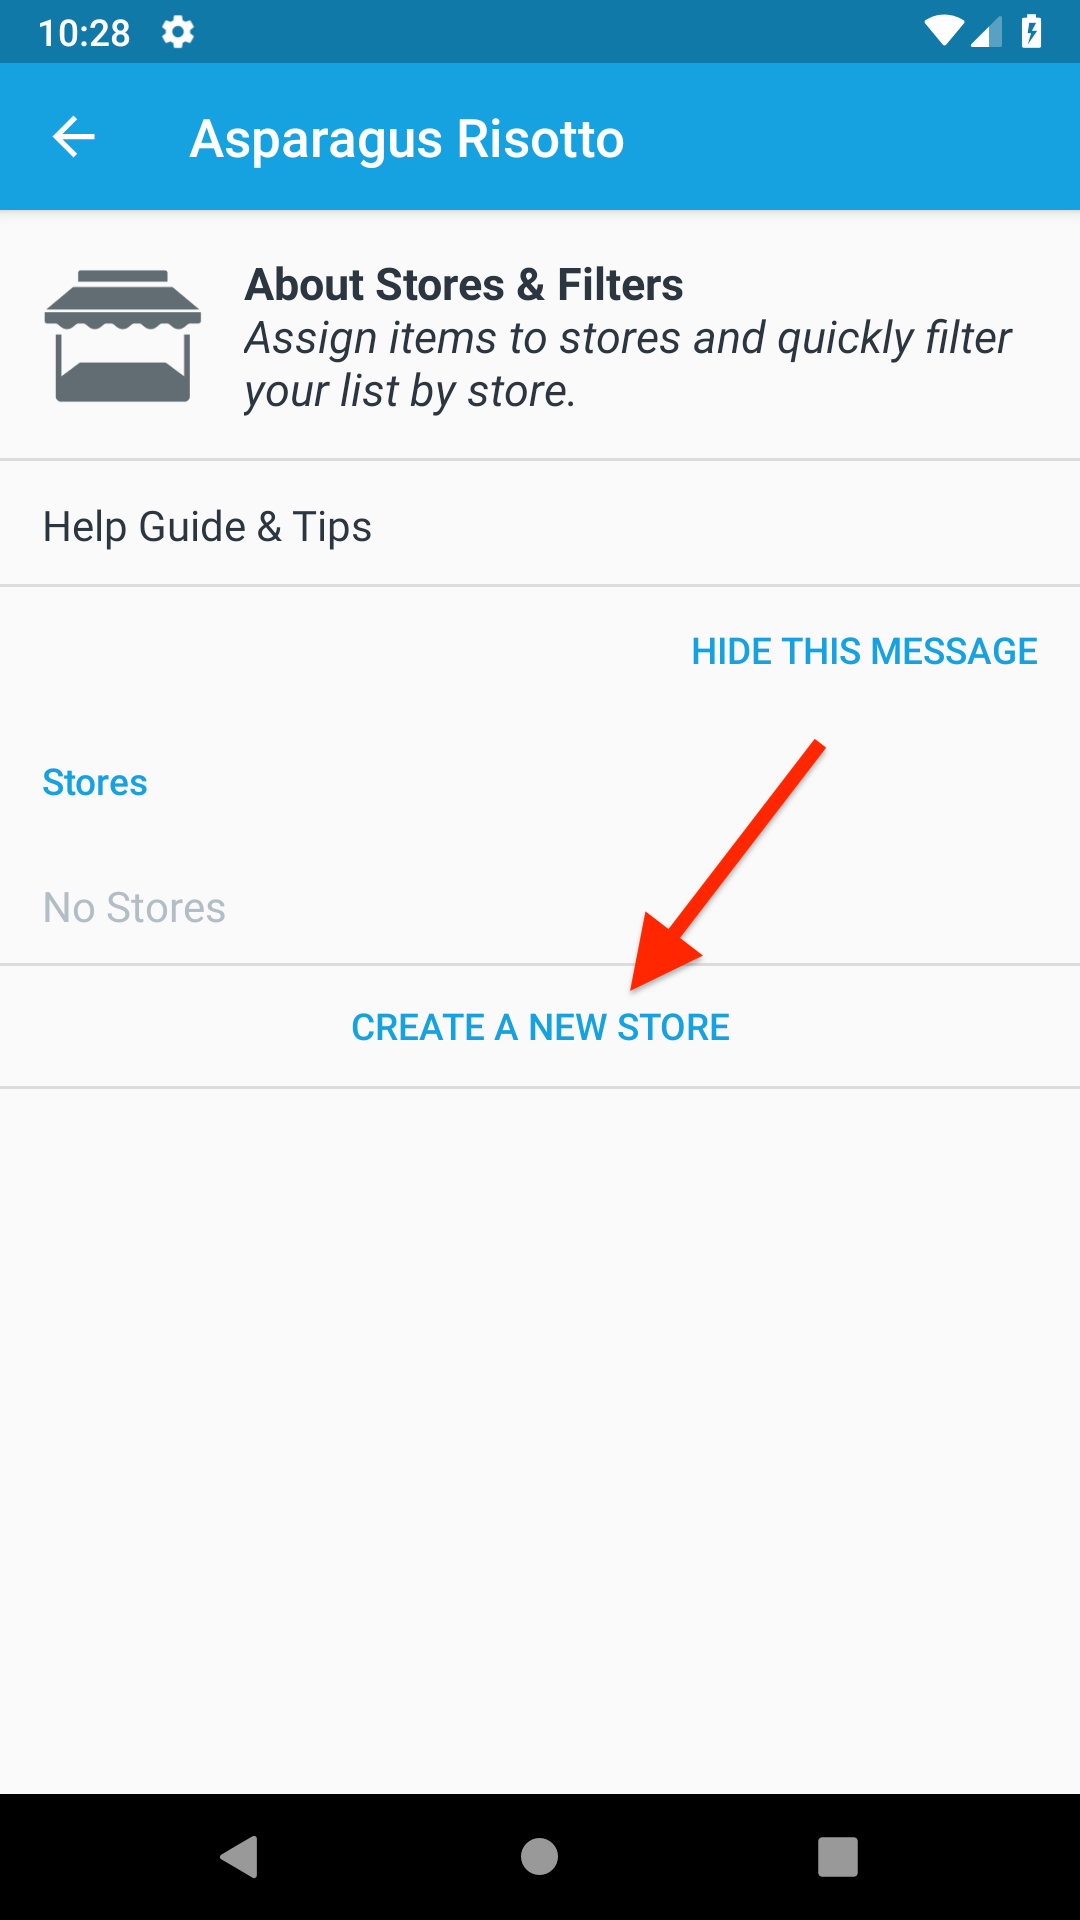
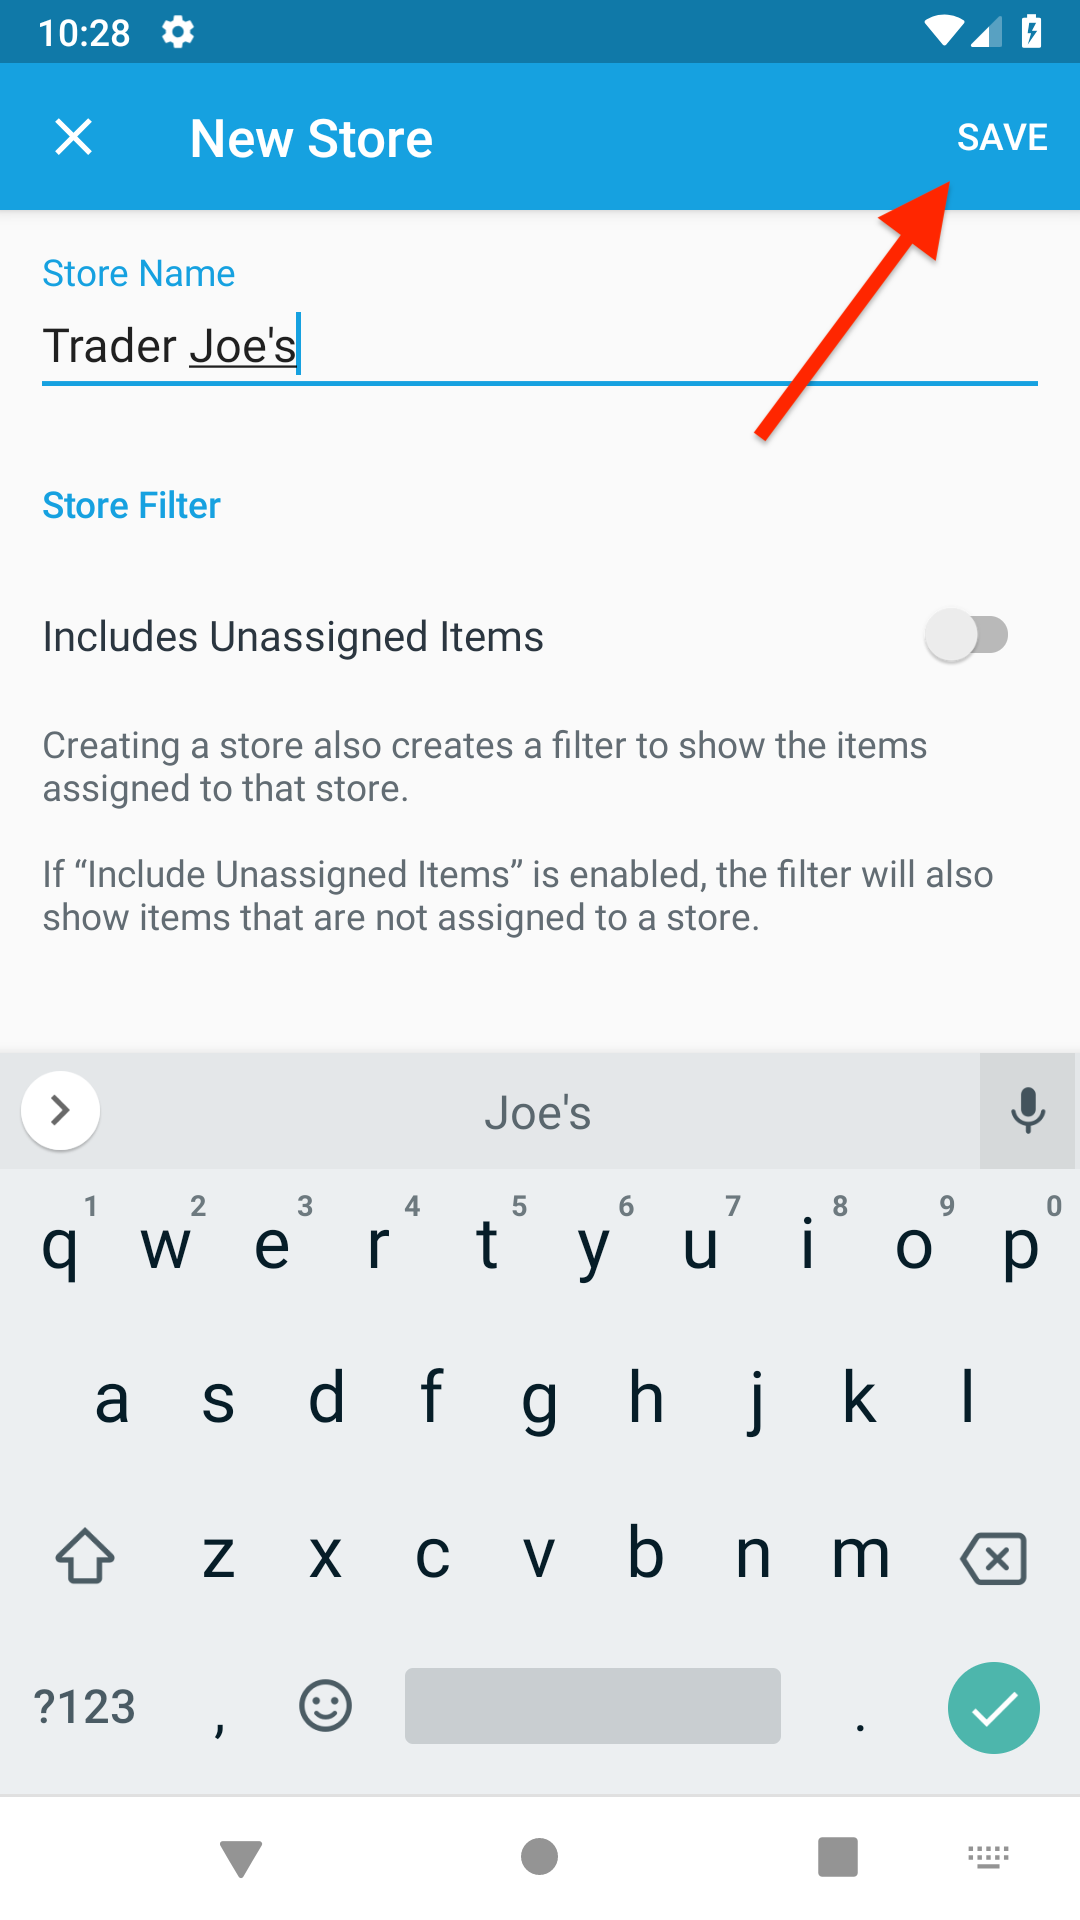
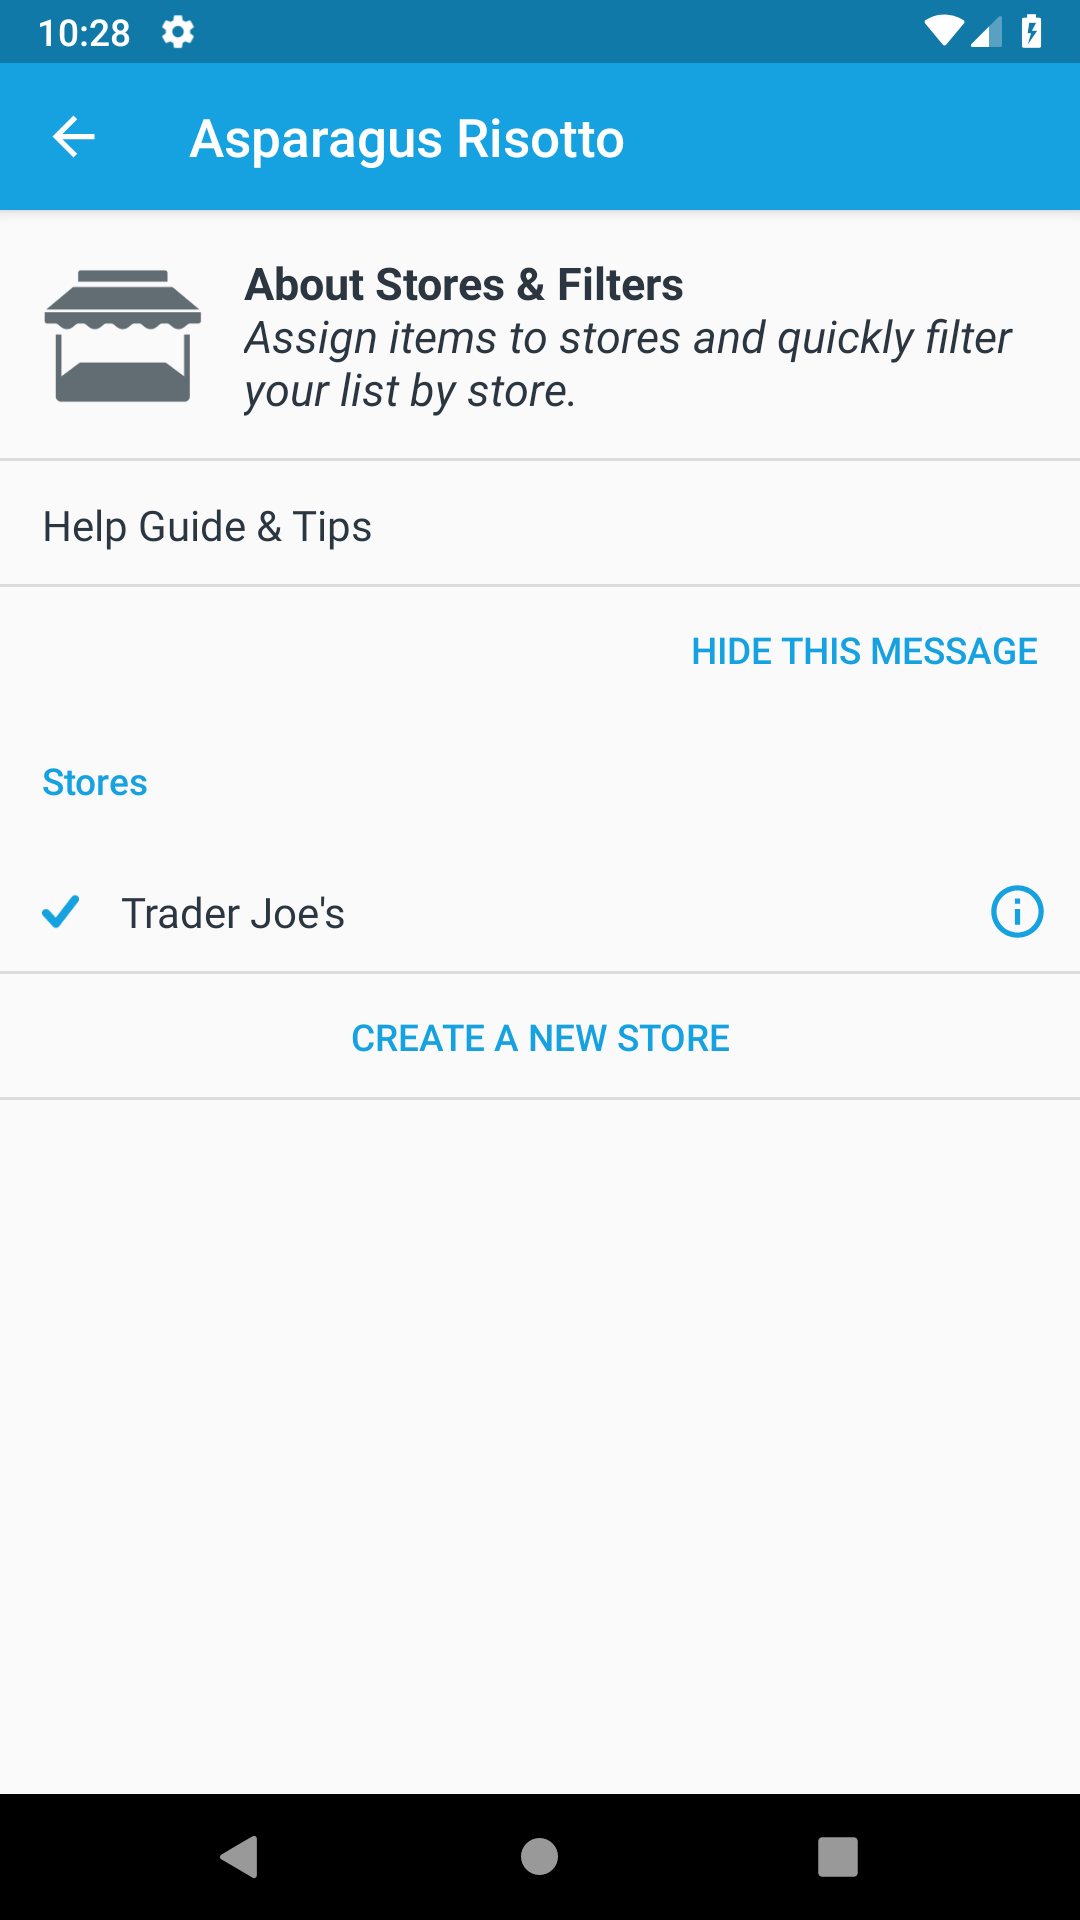
If you haven’t created a store yet, tap on Create a new store and enter a name for the store. Otherwise, tap one or more of your stores to select them.
![]()
![]()
-
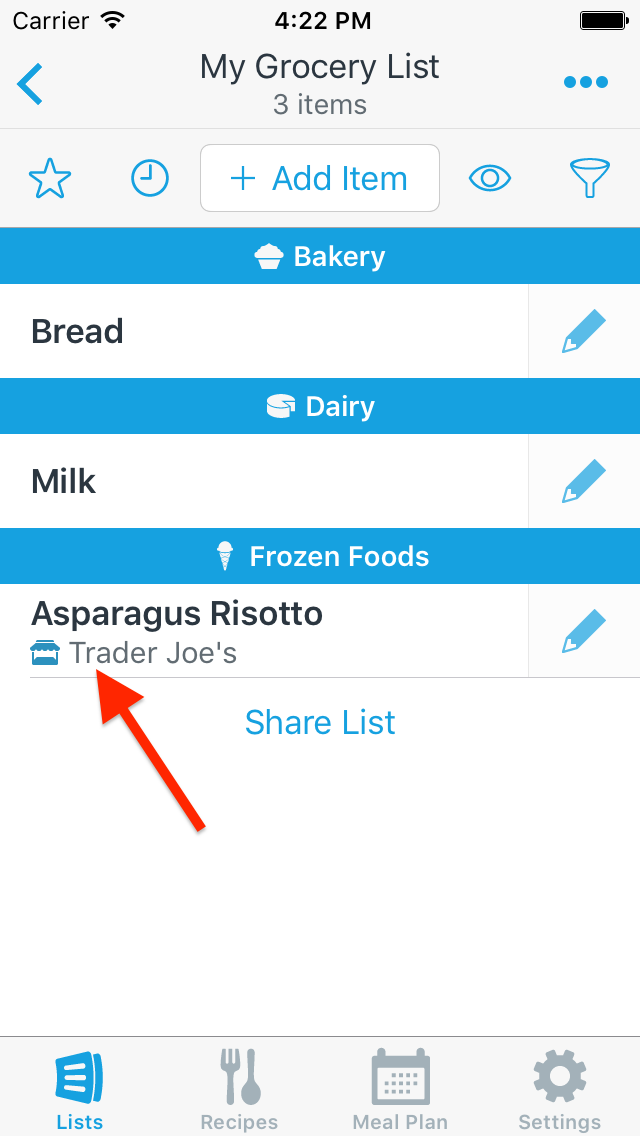
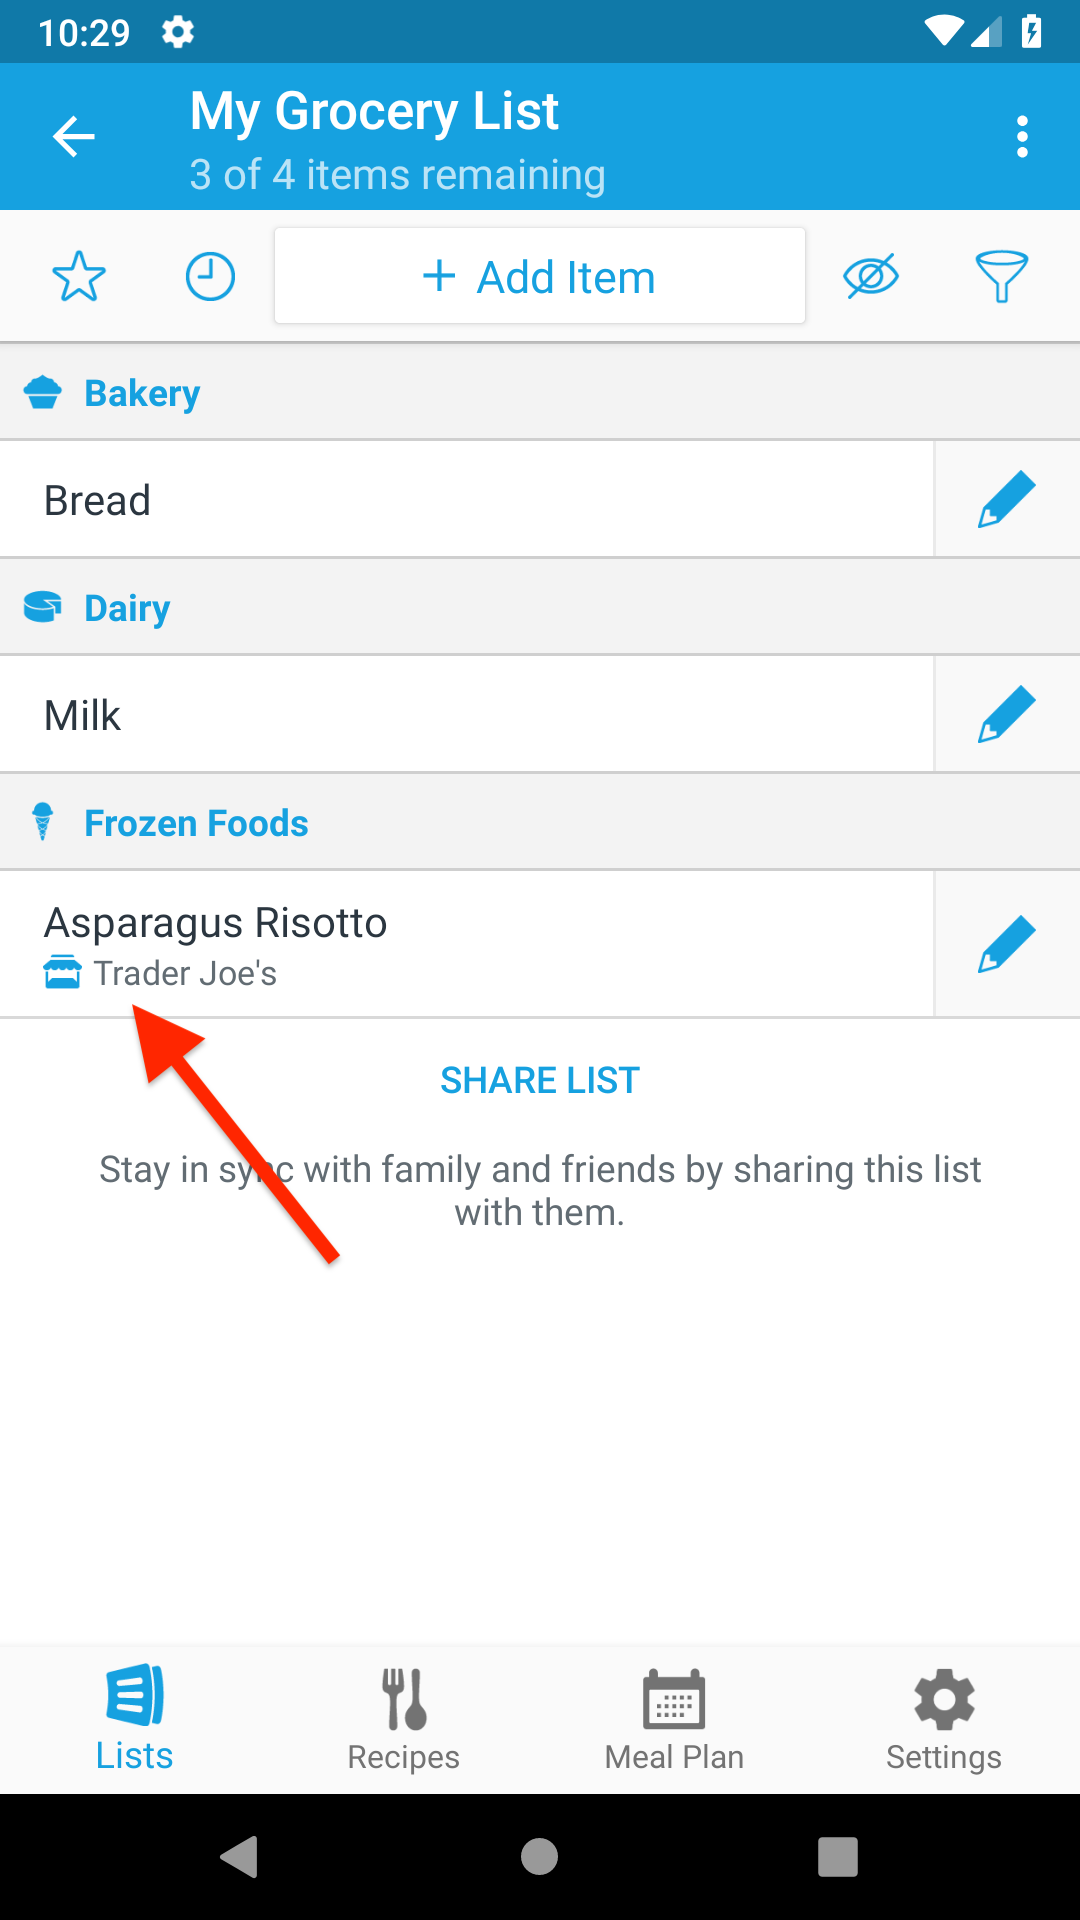
After assigning one or more stores, a store icon and the name of the assigned store(s) appear next to the item on the list screen.
![]()
-
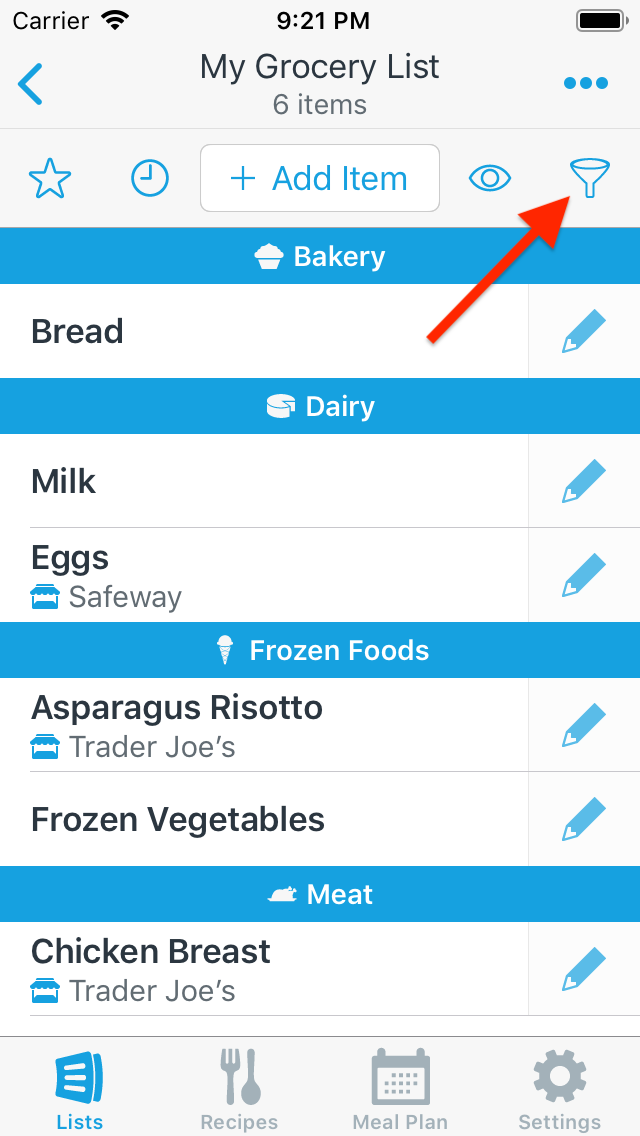
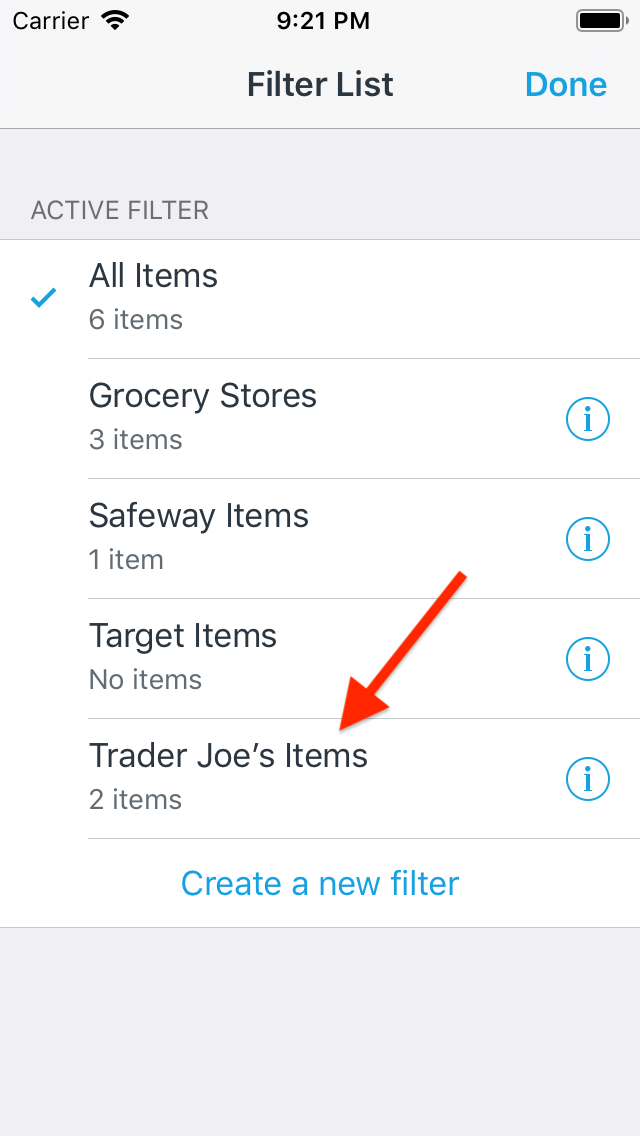
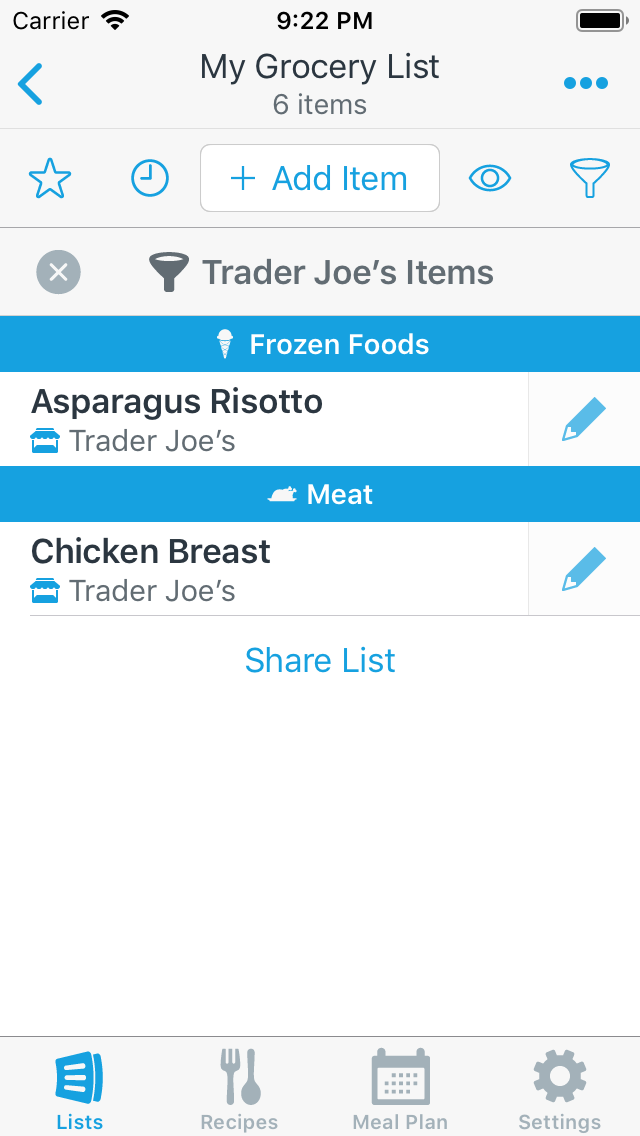
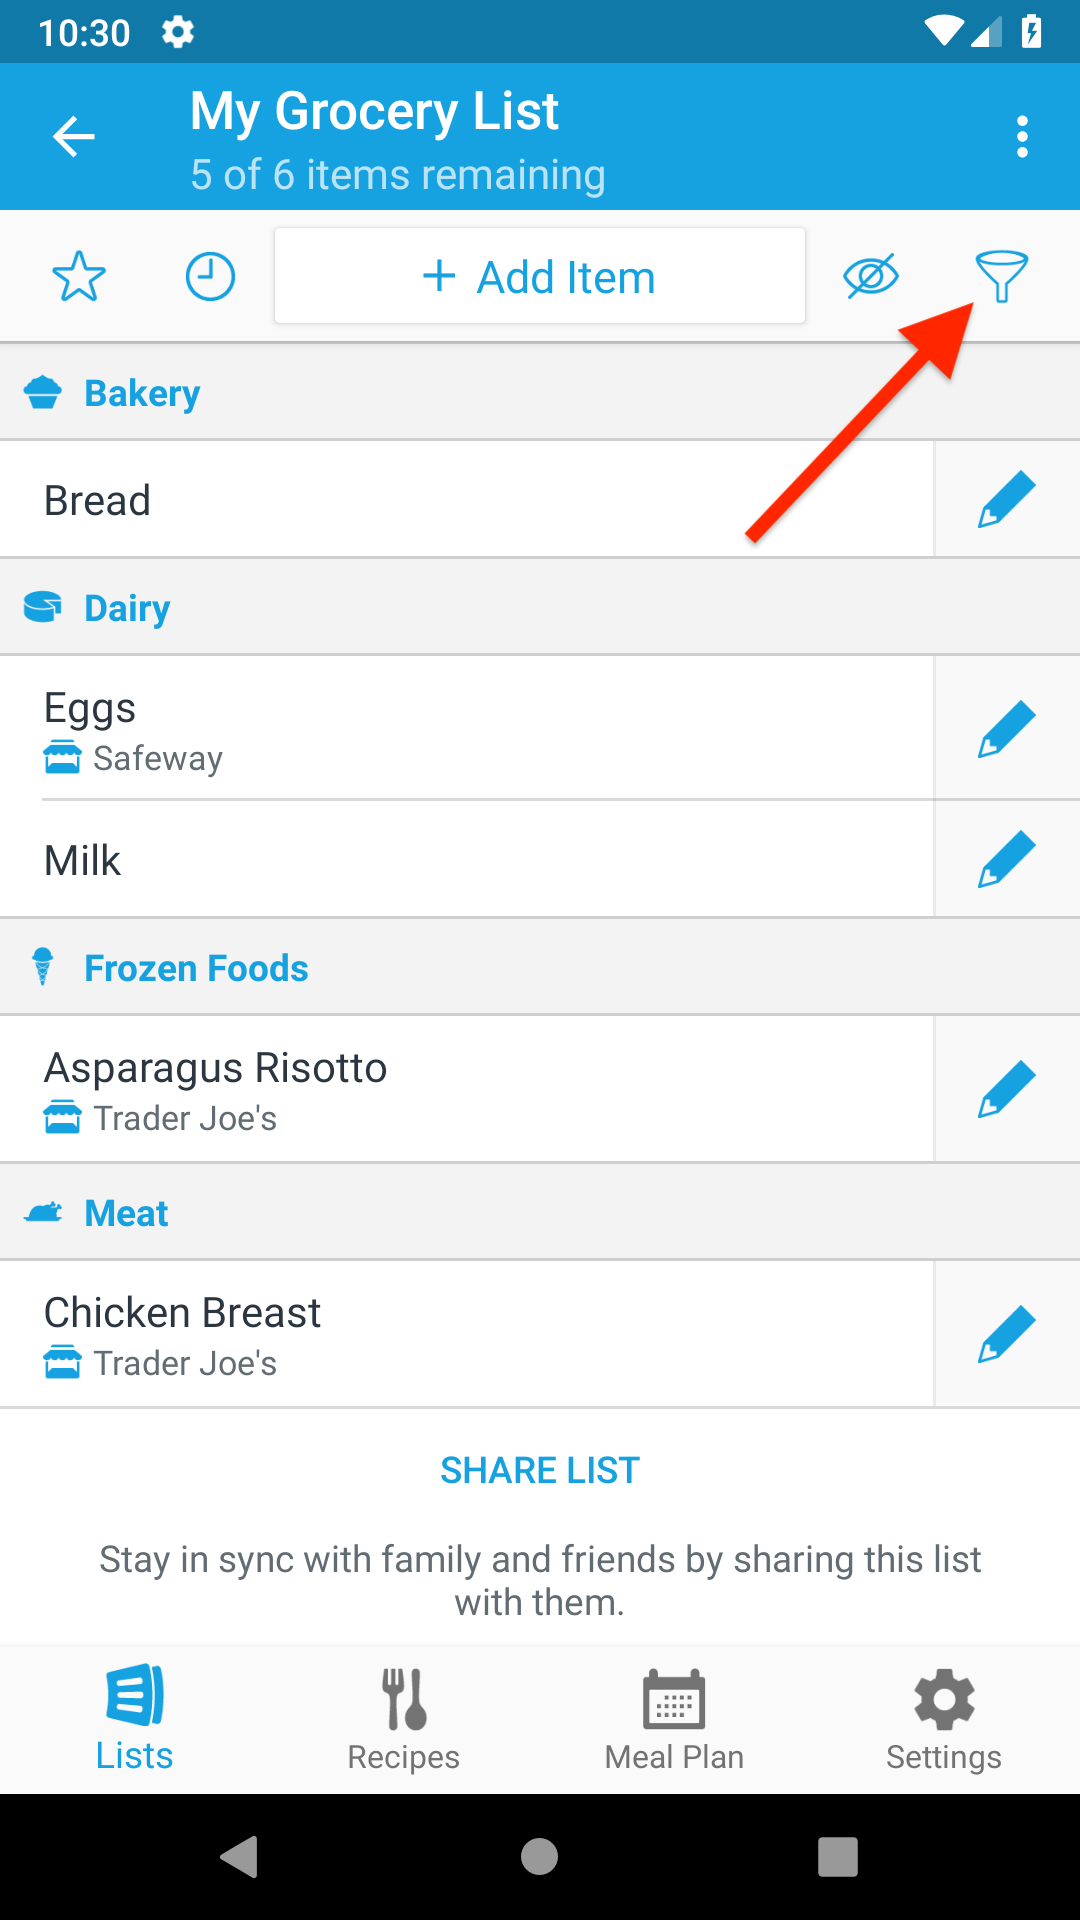
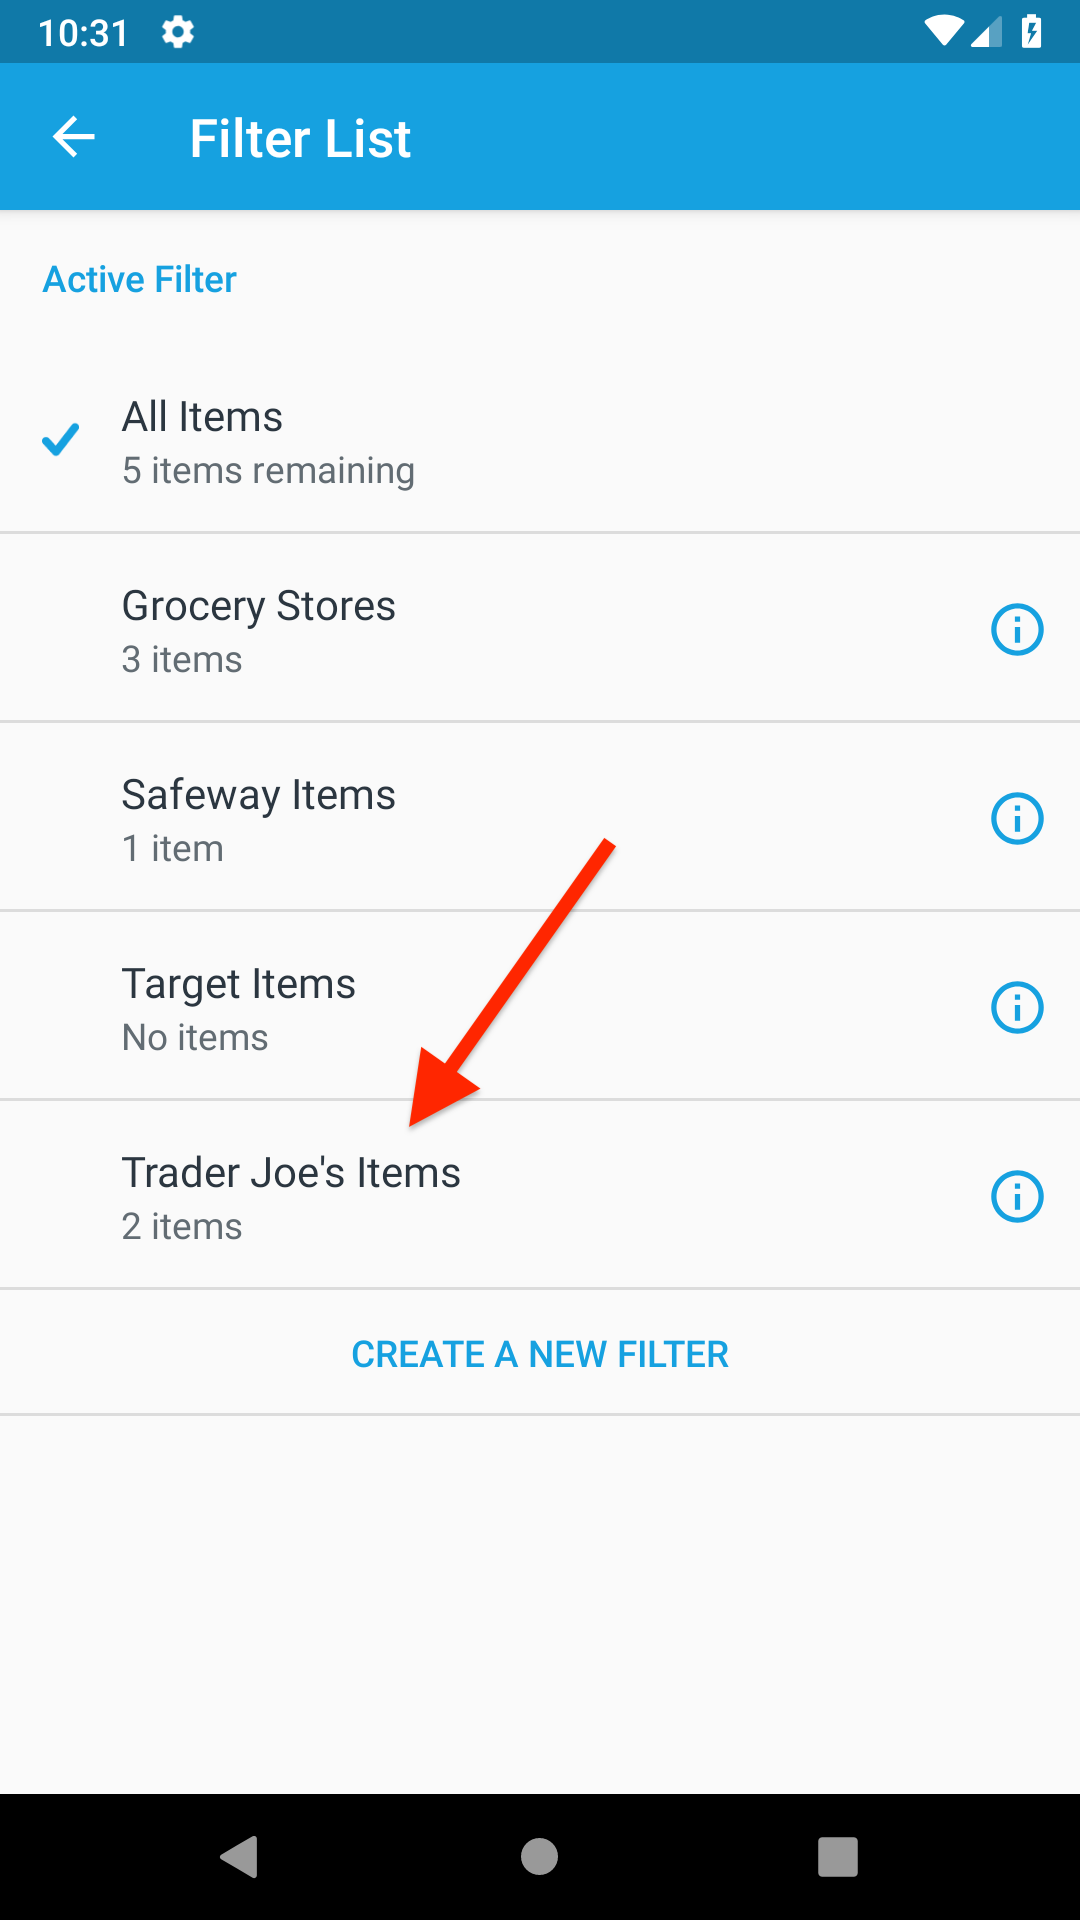
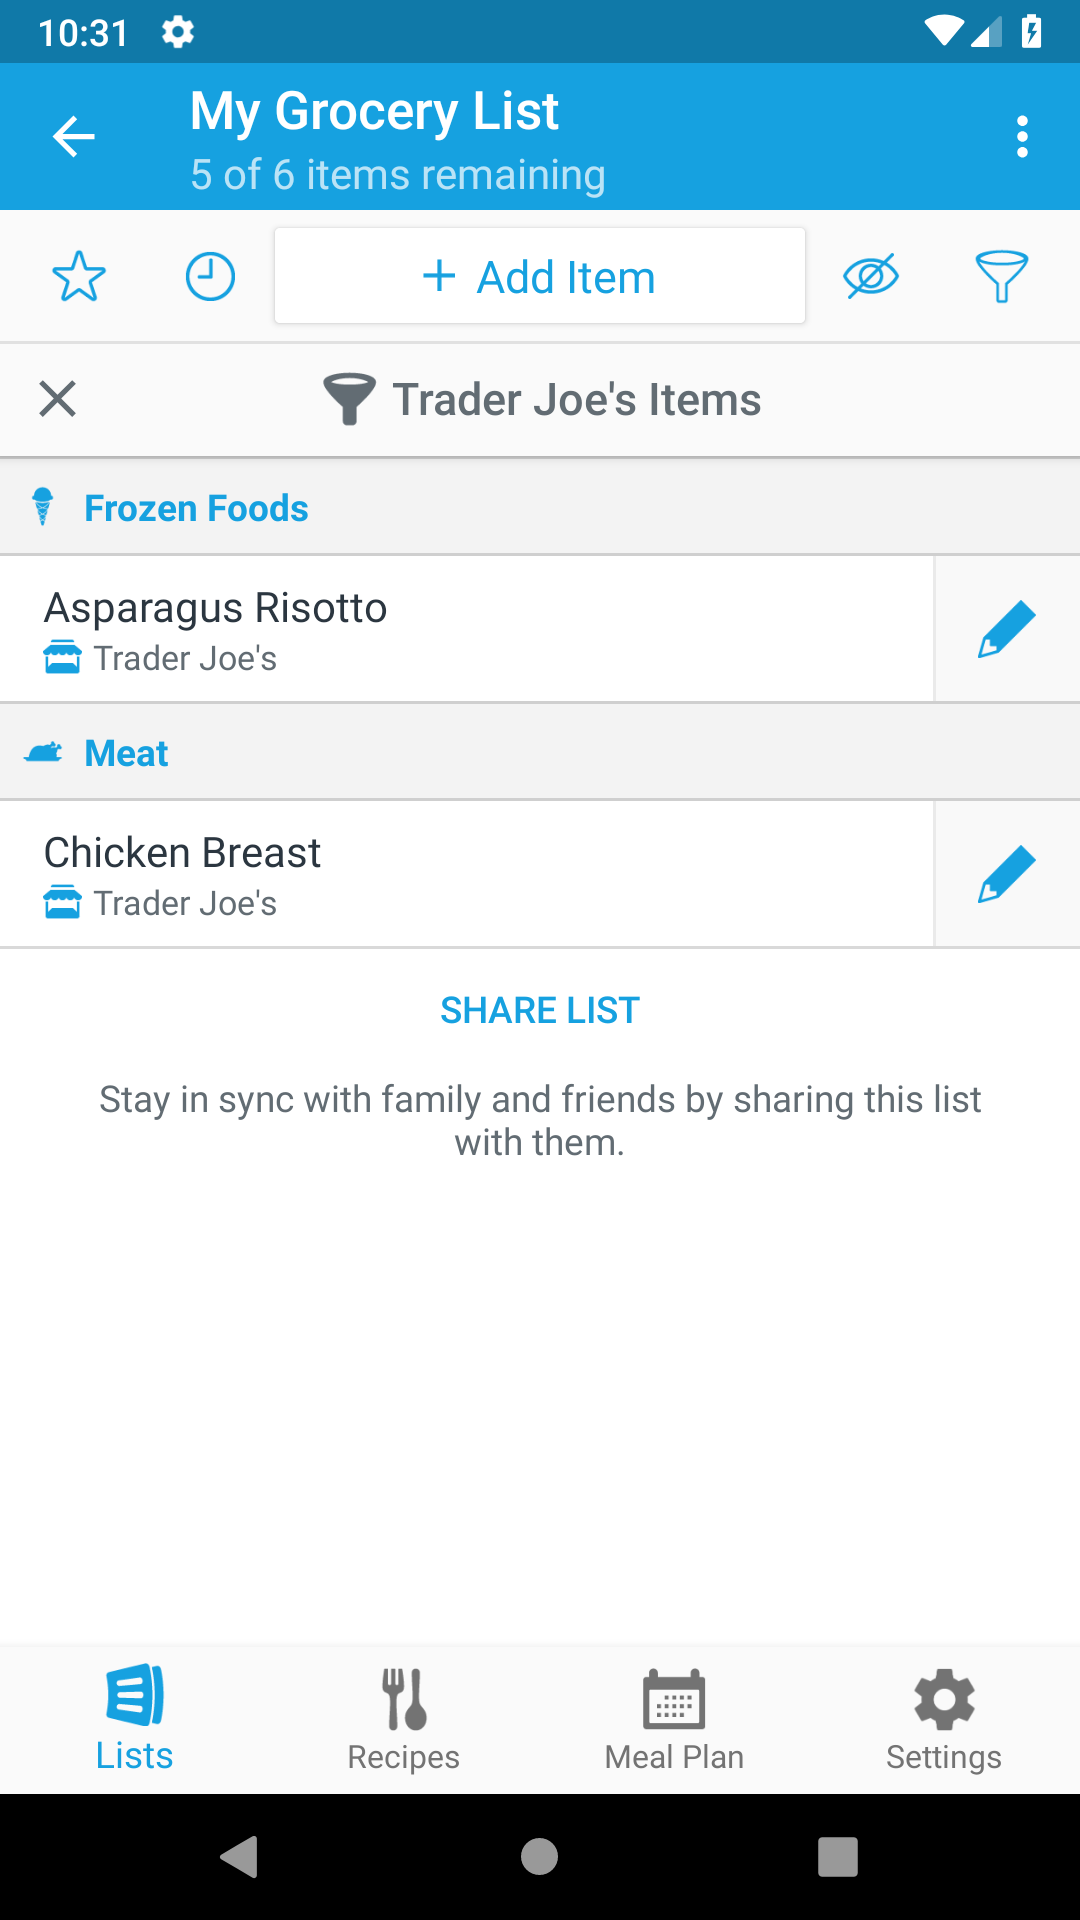
Creating a store also creates a filter for that store. To filter your list to only show you items from a particular store, tap the filter button and select a filter.
![]()
![]()
![]()
-
Find the item you’d like to assign to a store and tap the pencil icon to its right.
![]()
-
Tap the Stores row.
![]()
-
If you haven’t created a store yet, tap on Create a new store and enter a name for the store. Otherwise, tap one or more of your stores to select them.
![]()
![]()
![]()
-
After assigning one or more stores, a store icon and the name of the assigned store(s) appear next to the item on the list screen.
![]()
-
Creating a store also creates a filter for that store. To filter your list to only show you items from a particular store, tap the filter button and select a filter.
![]()
![]()
![]()
-
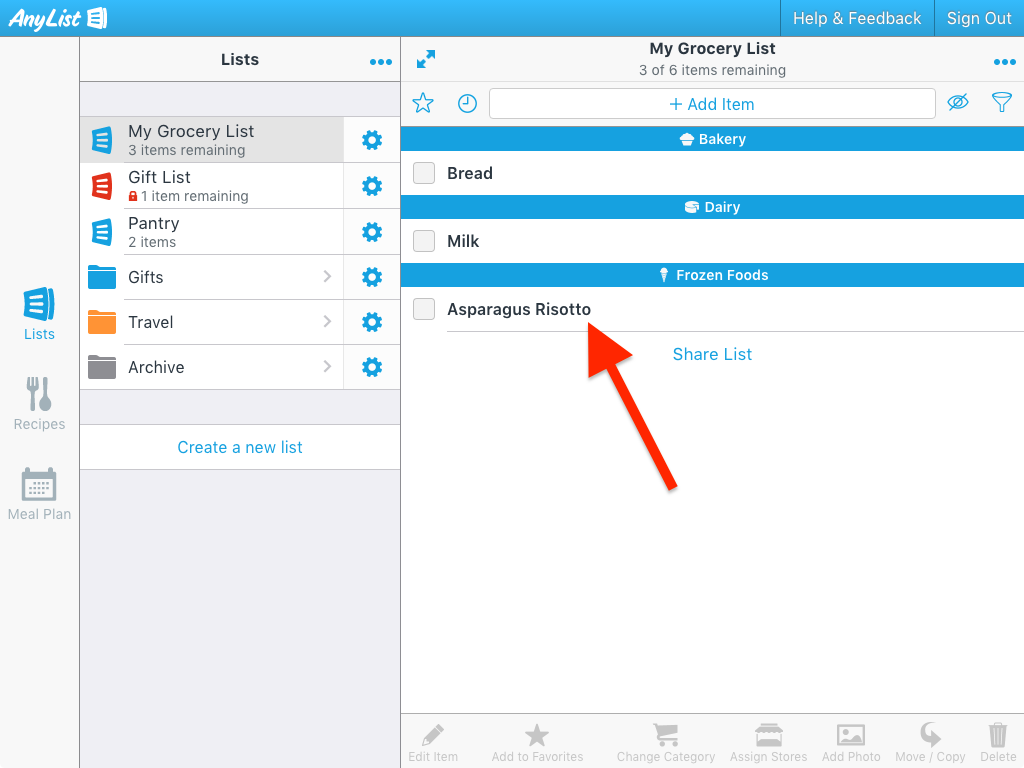
Select the item you’d like to assign to a store by clicking the item.
![]()
-
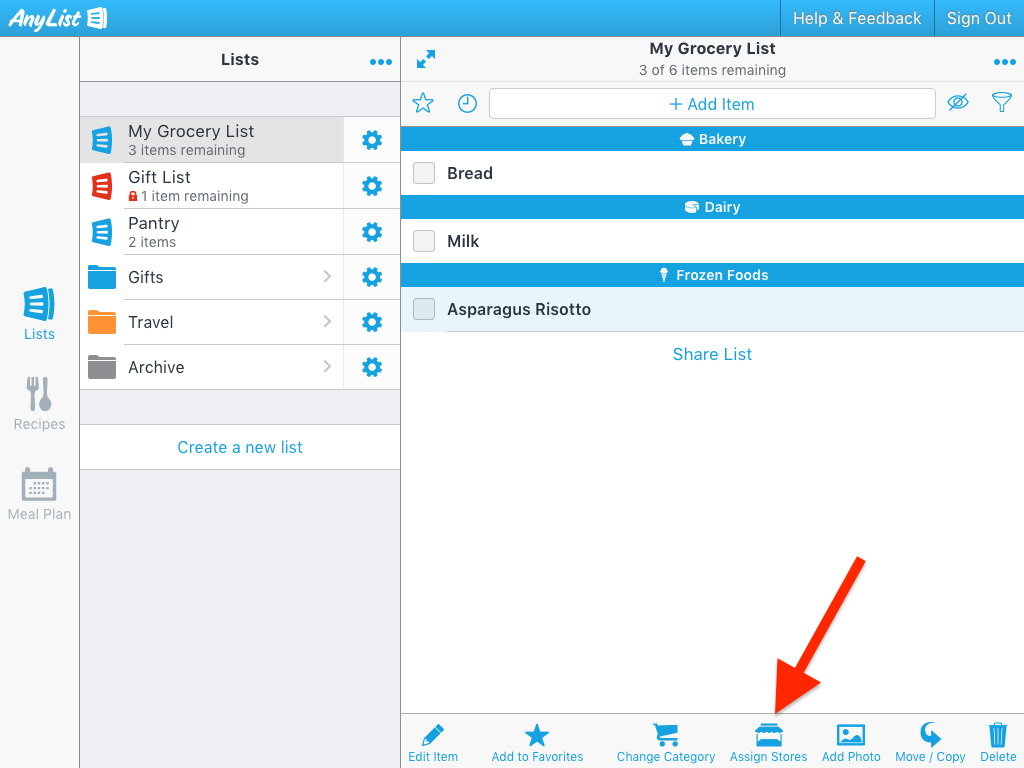
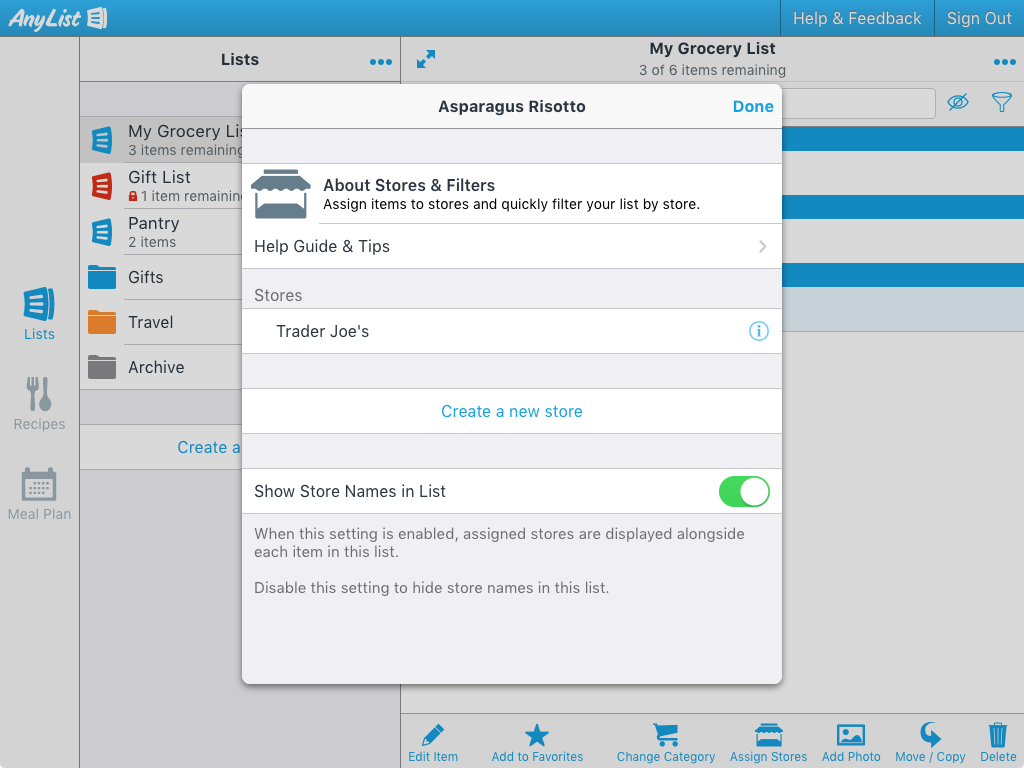
Click the Assign Stores button in the toolbar (or press the ‘s’ key) to bring up the Assign Stores screen.
![]()
![]()
Note: AnyList Complete is required in order to assign items to stores and create filters.
Did this answer your question? If not, please search all of our articles. If you don’t find an answer, then contact us and we’ll be happy to help.
